
Repair Techniques That Will Transform Your Walls
Introduction
Ah, the world of drywall repair: a realm where walls whisper tales of past mishaps and triumphs. Whether you’ve inadvertently opened a new ‘window’ with an enthusiastic doorknob or are dealing with the aftermath of a leaky pipe, mastering drywall repair can transform your home from a patchwork of memories to pristine perfection. With over 40 years in the home improvement business, My Dear Watson Handyman understands that tackling such tasks can be daunting—but fear not! We’re here to guide you through five professional techniques that will make your walls envy-worthy.
In American homes, drywall, also known as sheetrock or plasterboard, is a common sight. In fact, according to a report by Statista, the demand for drywall in the United States was expected to increase steadily up to 2023, driven by the booming construction sector. Thus, knowing how to repair it efficiently isn’t just a nifty skill; it’s almost essential homeowner wisdom!
In this blog post, we’ll explore:
- The art of wall patching and repairing sheetrock holes without breaking a sweat.
- Techniques for seamless drywall mudding and taping that even your detail-oriented aunt would approve of.
- Steps for ceiling repair that prevent your fixtures from descending unexpectedly.
- Tactics for addressing water-damaged drywall and turning it from a soggy disaster to dry splendor.
- Methods for fixing those sneaky wall cracks and dents that seem to appear overnight.
No need to don a cape—though you may feel like a superhero by the end of this tutorial. So grab your tools (or at least know where they are), because it’s time to give those walls the makeover they deserve!
“Good walls make good neighbors—especially when they’re repaired right!”
Through these tried-and-tested techniques and tips, we aim not just for aesthetic appeal but for long-lasting durability. After all, at My Dear Watson Handyman—a favorite among locals in Chelmsford, MA—quality workmanship isn’t just our promise; it’s our tradition.
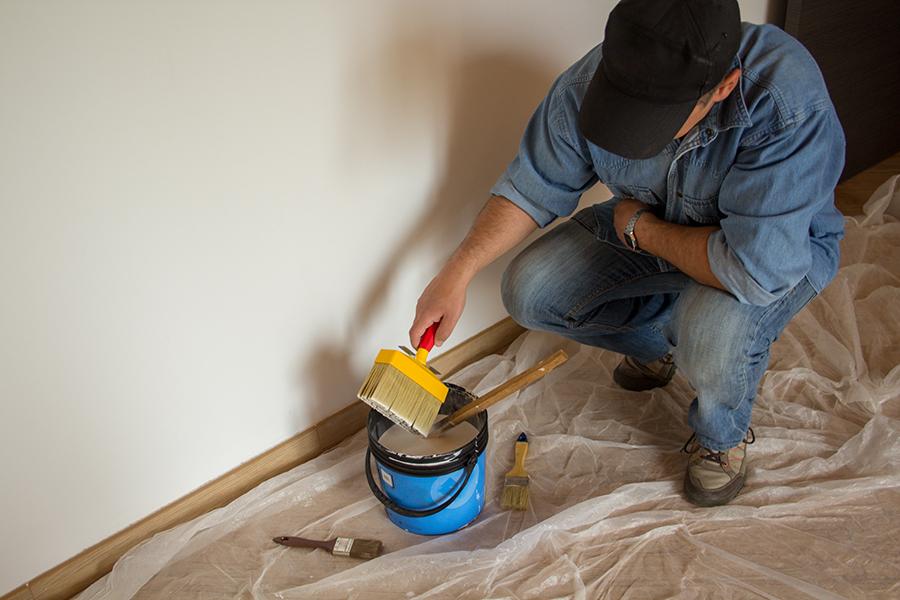
1. Wall Patching for Small Holes
If you’ve ever had an accidental encounter with a doorknob or witnessed the unfortunate aftermath of an indoor basketball game gone awry, you’re probably familiar with the vexing issue of small holes in drywall. Fear not! With just a few simple steps, wall patching is a straightforward process that can restore your walls to their previous glory.
Gather Your Materials
- Small hole patch kit: These kits are readily available at most hardware stores and typically contain all you need, including a self-adhesive mesh patch, sandpaper, and spackling compound.
- Spackling compound: An indispensable tool for filling small holes and cracks, including nail holes, during the repair process.
- Putty knife: You’ll use this to apply the spackle smoothly over the patch.
- Sandpaper (fine grit): For smoothing out the surface once the spackle has dried.
- Paint and primer: To match your existing wall color after repairs are complete.
The Repair Process
The process of wall patching can be likened to icing a cake—except there are no calories involved, just pure DIY satisfaction!
- Prep the Area: Start by cleaning around the hole to remove any dust or debris that could interfere with adhesion.
- Apply Patch: Place the self-adhesive mesh patch over the hole, ensuring it’s centered. This provides a solid foundation for your repair.
- Add Spackle: Using your putty knife, apply a generous amount of spackling compound over the patch to make the repair seamless. Smooth it out to blend seamlessly with the surrounding wall.
- Sanding Time: Once dry (usually takes about 24 hours), sand down any excess spackle until smooth. Remember that Rome wasn’t built in a day, nor is perfect drywall achieved without a little elbow grease!
- Paint & Finish: Apply primer followed by paint to match your current wall color and make the repair virtually invisible. Voilà! Your wall looks as good as new.
“An ounce of prevention is worth a pound of cure.” – Benjamin Franklin once wisely said. Consider installing door stoppers to prevent future mishaps!
Patching small holes not only improves aesthetics but also maintains structural integrity. For bigger jobs or if you’re feeling less handy than you’d like to admit, consider reaching out to professional drywall services like those offered by My Dear Watson Handyman. They bring expertise right to your doorstep and ensure every project finishes smoothly—first time, every time.
This simple yet effective method is akin to giving your walls a little TLC they deserve. After all, they’re holding up more than just photos; they’re supporting memories worth safeguarding!
2. Fixing Large Holes with Drywall Patching
Ah, the dreaded large hole in your drywall. It’s every homeowner’s nightmare—one minute you’re hanging a heavy mirror, and the next, you’re staring into the abyss (also known as your neighbor’s living room). But fear not! If you adhere to these professional techniques, fixing large holes with drywall patching can be effortless.
Gather Your Materials
- Drywall patch: a crucial aspect of drywall finishing techniques for effective repairs. Choose a patch that’s at least 2 inches larger than the hole on all sides.
- Joint compound: Also known as drywall mud. Joint compound plays a crucial role in ensuring seamless repairs.
- Putty knife: Preferably a wide one for spreading joint compound smoothly.
- Sanding block or sandpaper: For smoothing out the dried compound.
- Tape measure: Ensure precision when cutting your patch.
- Pencil: Mark your measurements accurately.
The Process
- Cut Out a New Patch: Measure the dimensions of the hole and add two inches to each side to create an overlap. Use these measurements to cut out a piece of new drywall. The extra size ensures stability and makes it easier to merge the patch with existing walls.
- Create a Support Structure: Secure two pieces of wood or furring strips vertically behind the hole using drywall screws. This provides support for the new patch, ensuring it doesn’t bend or fall through. (A failed patch job is like an unreliable friend—you never know when it’s going to let you down.)
- Screw the Patch into Place: Attach your new drywall piece over the hole by screwing it into the wooden supports you installed to elevate your drywall repair. Make sure it’s flush with your existing wall surface.
- Tape and Mud Like a Pro: Apply joint tape around the edges of your new patch to cover seams, then apply joint compound over it smoothly using a putty knife. Allow this layer to dry completely before sanding it down for an even surface.
- Smooth It Out: Sand down any uneven spots until you’re left with a perfectly flat surface that matches your wall’s texture. Repeat applying more joint compound if necessary and sand after each layer has dried thoroughly for best results, especially on rough edges.
To achieve the flawless finish we all desire in our homes, a little patience is essential! Remember, when in doubt, consult professionals like those at My Dear Watson Handyman, who excel at transforming interior spaces with expert techniques and quality workmanship. They might even give you some tips while they’re at it!
If you’re interested in learning more about potential updates around your home that are both practical and eco-friendly, check out our article on sustainable handyman services in MA.
“When patching large holes, always make sure that you have enough support behind your repair area before mounting any new patches.” — Bob Vila
Tackling large holes might seem intimidating at first glance, but with these steps, you’ll transform those gaping voids into seamless parts of your beautifully repaired walls!
3. Ceiling Repair Techniques
When it comes to ceiling repair, most homeowners might prefer to just “keep their heads down” rather than look up at the daunting task above them. But fear not! With the right techniques and a touch of patience, you can transform that ceiling from drab to fab without pulling your hair out—or your neck!
Tackling Water Damage
Water-damaged ceilings are as common as they are unsightly. Whether it’s from a leaky roof or a rogue bathtub overflow, water can leave unsightly stains and weaken the structural integrity of your ceiling. The key is to address the source of the leak first (might we recommend our Gutter Cleaning and Repair Services?) and then focus on the repair.
- Step 1: Cut out the damaged area with a utility knife, preparing for larger repairs if needed.
- Step 2: Replace it with new drywall or plasterboard, ensuring it’s securely fastened to ceiling joists.
- Step 3: Apply a stain-blocking primer before painting to prevent those pesky marks from resurfacing.
Patching Holes in Drywall Ceilings
A hole in your ceiling can feel like you have an unwanted skylight. Fortunately, there’s an easy fix for that:
- Step 1: Cut a piece of drywall slightly larger than the hole.
- Step 2: Use drywall screws to attach it firmly in place.
- Step 3: Cover seams with mesh tape, then apply several layers of joint compound, sanding between layers for smoothness.
Smoothing Textured Ceilings
If popcorn ceilings aren’t your jam (or jelly), consider removing or refinishing them for a modern look. While this project usually involves significant elbow grease, it’s well worth it for that sleek finish!
“Textured ceilings can trap dust and cobwebs—they’re like Velcro for dirt. Removing them not only updates your home but also makes cleaning easier.” — Home Improvement Experts
If the DIY approach sounds too much like an episode from a reality TV nightmare, consider checking out professional drywall installation services.
You can rely on the skilled professionals at My Dear Watson Handyman to provide dependable craftsmanship in your home, literally! Remember, we have the ladder-ready solutions you need when life gets overwhelming!
4. Mudding and Taping for Seamless Finishes
Mudding and taping are essential tools for achieving a perfectly smooth wall finish in drywall repair. Whether you’re dealing with a pesky little hole left behind by an overzealous doorknob or tackling an ambitious drywall installation, mastering these techniques can transform your walls from drab to fab.
The Technique Behind the Magic
Mudding involves applying joint compound to cover the seams between drywall sheets, as well as any screws or nails used during installation. It’s like the frosting on a cake—only slightly less delicious but equally essential. The key is to apply thin, even layers and allow them to dry completely before adding more.
- First Coat: Apply a layer of joint compound over seams and screw holes.
- Tape Application: Immediately press drywall tape into the wet mud along the seams to ensure the best drywall adhesion.
- Subsequent Coats: Apply two or more additional coats of compound, feathering each layer beyond the last to create a smooth transition.
- Sanding: Once dry, sand lightly between coats for a flawless finish.
If this process sounds like it requires patience, that’s because it does. But trust us—your walls will thank you for it!
Avoiding Common Pitfalls
Avoid rushing through mudding and taping. This isn’t a race, folks! Hastily applied compound can lead to bubbles or uneven surfaces that require more work in the long run, making it essential to follow the guide to drywall repair. According to Family Handyman, one of the biggest mistakes beginners make is not taking time to ensure each layer is dry before applying another.
“Perfect wall finishes are not accidents; they’re crafted with care and precision.” ― The Wise Drywall Sage
For those daunted by the process or looking for professional help, consider reaching out to local experts like our team at My Dear Watson Handyman. Our experienced professionals are equipped with all the necessary skills and tools—and yes, we promise not to eat your frosting—so you can get impeccable results without lifting a finger.
5. Addressing Surface Cracks and Nail Pops
Nobody likes a wall that resembles the surface of the moon with all its craters and cracks. Fortunately, addressing surface cracks and pesky nail pops in your drywall doesn’t require a degree in astrophysics—just a bit of know-how.
Tackling Surface Cracks
Surface cracks often appear due to temperature changes or settling foundations. Start by cleaning the crack to remove any dust or debris. A vacuum or a soft, damp cloth works wonders here. Once clean, apply a wall joint compound using a putty knife. Remember, patience is key—apply thin layers and allow each to dry before adding the next.
- Smooth It Out: Sand down the dried compound for a silky finish.
- Prime Time: Apply primer before painting to ensure even color absorption.
The result? Walls so smooth you might be tempted to take up indoor rock climbing just for the extra challenge, thanks to your drywall finishing techniques!
Navigating Nail Pops
Nail pops are like that one friend who shows up uninvited to every party—annoying but manageable. To fix them:
- Remove any loose material around the pop.
- Screw drywall screws into place just above and below the popped nail for extra security.
- Hammer in the popped nail slightly below the surface.
- Cover both screws and the nail with joint compound and let it dry.
- Smooth operator once more: Sand it until smooth, then prime and paint.
Consider professional drywall services from My Dear Watson Handyman, a trusted name in home repairs for over 40 years in Massachusetts, if nails keep popping up. For more advanced solutions, check out our detailed guide on drywall installation services.
“Good walls make good neighbors.” – Robert Frost had it right, though he probably didn’t have our expertise on speed dial.”
The secret sauce lies not just in fixing what’s broken but ensuring it stays fixed. With these techniques, your walls will not only look great but also stand strong against future imperfections. Whether you’re dealing with minor blemishes or major repairs, remember there’s always an expert ready to lend a helping hand—or trowel!
Conclusion
In the patchwork world of drywall repair, mastering professional techniques can feel like solving a mystery worthy of Sherlock Holmes himself. Whether you’re dealing with pesky nail pops, unsightly wall cracks, or those infuriating dents from a rogue doorknob, these expert methods are your indispensable toolkit. By embracing approaches such as precise drywall installation, strategic taping, and seamless mudding, you’re not just making repairs; you’re transforming your walls into pristine canvases.
Remember, even the best detectives rely on a little help from their friends. If the task seems daunting or if you’re aiming for a flawless finish that would make Sherlock nod in approval, consider reaching out to professionals. For over 40 years, we at My Dear Watson Handyman Professionals have been mastering home repairs, including the best drywall methods for flawless results. Our commitment to quality workmanship ensures that your wall damage restoration is handled with precision and care.
Entrusting your home to experienced hands brings peace of mind, especially when they are skilled in drywall finishing techniques. As we say in our industry, “It’s not just about plugging holes; it’s about crafting solutions.” So whether you’re tackling a DIY drywall fix or opting for professional services, remember that every successful repair brings you one step closer to home improvement perfection.
“The details are not the details. They make the design.” – Charles Eames
For more tips and expert advice on home repair and maintenance, feel free to explore our services. With us by your side, no project is too small and no wall too damaged—because every wall deserves its day in the sun.
FAQ
Q: What are the top 5 drywall repair techniques for a professional finish?
A: The top 5 drywall repair techniques include using joint compound for smooth finishes, mastering the art of feathering the edges, applying spackling for small holes, repairing larger holes with a patch, and ensuring a proper texture match for seamless blending with the existing drywall surface.
Q: What tools and materials do I need for drywall repair?
A: Essential tools and materials for drywall repair include a utility knife to cut drywall, a drywall saw for larger holes, joint compound, spackle for fixing small imperfections, sandpaper for smoothing surfaces, and a corner bead for reinforcing edges.
Q: How can I fix small holes in drywall?
A: To fix small holes, use spackle to fill the hole, then allow it to dry. Once dry, sand the area to achieve a smooth finish, and if necessary, apply a second coat of spackle before sanding again.
Q: What is the best way to repair larger holes in drywall?
A: For larger holes, cut out the damaged section and use a drywall saw to create a clean opening. Fit a new piece of drywall into the hole, secure it with screws, apply joint compound to feather the edges, and sand the area for a seamless repair.
Q: How do I achieve a texture match when repairing drywall?
A: To achieve a texture match, first determine the existing drywall texture. You can use techniques like rolling or spraying to replicate the texture. Apply joint compound with a brush or sponge for knockdown textures, and practice on a scrap piece to ensure a perfect blend.
Q: What are some tips and tricks for mastering drywall repair?
A: Some tips for mastering drywall repair include always choosing the right tools for the job, allowing each layer of compound to dry fully before sanding, and using a utility knife to cut cleanly. Additionally, consider practicing on scrap pieces to refine your technique before tackling visible repairs.
Q: How can I repair textured drywall without leaving imperfections?
A: To repair textured drywall without leaving imperfections, carefully match the existing texture by using the same application technique (e.g., sprayer, brush). After applying the joint compound, use the appropriate tool to create the texture pattern before it dries, ensuring a professional finish.
Q: What should I do if I notice drywall damage around a corner bead?
A: If you notice drywall damage around a corner bead, you should first remove any loose or damaged material. Then, reattach or replace the corner bead as needed, fill gaps with joint compound, and sand the area smoothly to blend it with the surrounding drywall.
Q: When should I consider hiring a professional contractor for drywall repair?
A: You should consider hiring a professional contractor for drywall repair if you are faced with extensive damage, such as large holes or structural issues, or if you are not confident in achieving a professional finish on your own. A contractor like My Dear Watson Handyman can also help with more complex repairs and ensure that the work meets building codes.
True-or-False Quiz: 5 Professional Drywall Repair Techniques That Will Transform Your Walls
- Proper techniques are not necessary when it comes to drywall installation because any patchwork will eventually blend in.
- False – Using proper techniques is crucial because poorly patched areas can be noticeable, preventing a seamless finish.
- When repairing damaged drywall, you should always start by carefully removing any loose pieces to assess the extent of the damage.
- True – Carefully removing any loose drywall helps determine the extent of the damage and ensures the patched areas adhere properly.
- For larger holes caused by accidents, applying a single thick layer of joint compound will achieve the best results.
- False – When repairing a larger hole from an accident, it’s important to allow each layer to dry before applying the next. Thick layers can shrink and crack.
- Using a drywall knife to feather the edges of the patch will help repairs blend into the rest of the wall.
- True – Feathering the edges to blend with a drywall knife ensures the patch transitions smoothly into the rest of the wall for a professional look.
- A patch for a larger hole should be slightly smaller than the hole to make fitting it easier.
- False – A patch for larger holes should be slightly bigger than the hole so it can be secured properly and create a flush surface.
- Joint compound should be applied in one thick coat to speed up the repair process.
- False – Joint compound to fill patches should be applied in multiple thin coats, allowing each layer to dry to avoid cracking and ensure durability.
- The right tools and materials can make a significant difference in achieving a seamless finish when patching a small hole.
- True – The right tools and materials ensure a smooth repair, helping patched areas disappear into the whole wall.
- When fixing larger holes caused by accidents, it’s best to reinforce the patch with a support piece behind the drywall.
- True – Larger holes often need reinforcement to support the patch and keep your walls strong. A backing piece, like a wooden board, adds stability.
- Skipping the feathering process will not affect the final appearance of the repaired area.
- False – Skipping feathering the edges to blend can leave visible ridges, making it harder to match the repair with the rest of the wall.
- If done correctly, drywall repairs can keep your walls looking as good as new without noticeable imperfections.
- True – The goal is to make the repair disappear by using proper techniques, ensuring your walls look flawless.
This quiz will help anyone understand the 5 essential techniques for drywall repair while reinforcing best practices for achieving a seamless finish!